
Sanding an end grain cutting board is a crucial step to ensure its durability, smoothness, and overall functionality. Whether you’re restoring an old cutting board or working on a new one, proper sanding can make a world of difference. This guide will walk you through everything you need to know, step by step, to get a smooth and polished finish that’s safe for use in your kitchen. If you’re a beginner, don’t worry—this article is designed to be easy to follow and simple to understand.
Why Do End Grain Cutting Boards Need Sanding?
End grain cutting boards are made by positioning the wood fibers vertically, creating a highly durable surface that’s both knife-friendly and long-lasting. However, because the ends of the wood fibers are exposed, they tend to absorb moisture, oils, and food particles more easily. Over time, this can lead to rough textures, stains, or even small cracks in the wood.
Sanding helps smooth out these rough patches, removes any imperfections, and restores the cutting board’s appearance. It also prepares the surface to absorb oils or finishes, which protect the board from damage and extend its lifespan. Without proper sanding, an end grain board may feel uneven, dull, or unpleasant to use.
Tools You’ll Need for Sanding an End Grain Cutting Board
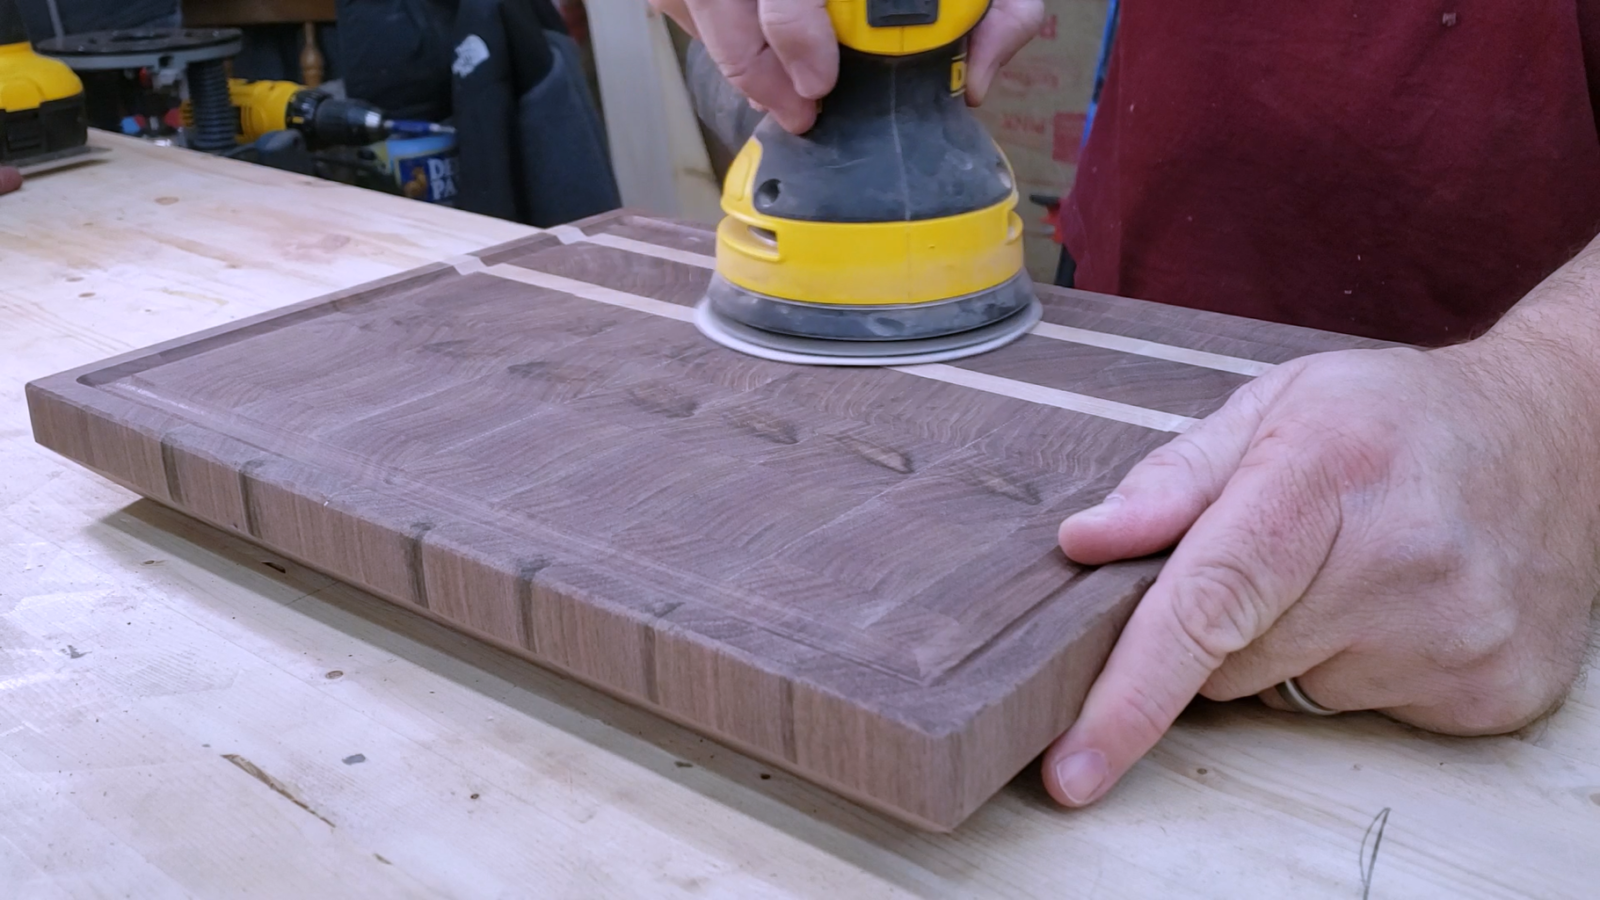
Before you begin, it’s essential to gather the right tools and materials to make the sanding process easier and more effective. Here’s what you’ll need:
- Sandpaper: A variety of grits (ranging from coarse to fine) is essential for achieving a smooth finish.
- Orbital Sander or Hand Sander: While optional, a sander can save time and effort.
- Cloth or Tack Cloth: To remove sawdust after sanding.
- Mineral Oil or Food-Safe Finish: For conditioning and sealing the board after sanding.
- Sanding Block (Optional): Helps when sanding by hand to maintain even pressure.
- Vacuum or Brush: To clean up excess dust from the surface.
Having the right tools ensures the process is smooth, efficient, and produces professional-looking results.
Best Types of Sandpaper for End Grain Boards
When sanding an end grain cutting board, choosing the right sandpaper is key to achieving a smooth and even finish. Here are some tips for selecting the best sandpaper:

- Coarse Grit Sandpaper (60-80 grit): Use this to remove deep scratches, stains, or uneven surfaces. This is your starting point for heavily used or rough boards.
- Medium Grit Sandpaper (120-180 grit): Ideal for smoothing out the surface after using coarse sandpaper. This grit helps transition to finer sanding.
- Fine Grit Sandpaper (220-400 grit): Perfect for achieving a silky-smooth surface that’s ready for oiling or finishing.
- Extra-Fine Grit Sandpaper (600 grit and above): Use this for a glass-like finish or if you’re aiming for perfection.
Do You Need a Sander or Can You Sand by Hand?
Both options work well, but the decision depends on your preference and the condition of your board. If the board has significant wear, stains, or uneven spots, an orbital sander can save you time and effort. However, for small touch-ups or lighter sanding, hand sanding is sufficient and gives you more control over the process.
Additional Items for a Smooth Finish (Oil, Cloth, etc.)
Once you’ve sanded your cutting board, applying a food-safe oil or finish is essential. Mineral oil is the most popular choice as it’s food-safe, easy to apply, and helps maintain the board’s condition. You’ll also need a soft cloth to buff the surface and ensure even application. Beeswax is another option for adding a protective top layer after oiling.
Step-by-Step Guide to Sanding an End Grain Cutting Board
Follow these simple steps to sand your end grain cutting board:
- Prepare the Board:
- Clean the board thoroughly and allow it to dry completely.
- Inspect for deep scratches, stains, or uneven areas.
- Start with Coarse Sandpaper:
- Attach 60- or 80-grit sandpaper to your sander or sanding block.
- Sand in small, circular motions or along the grain, applying even pressure.
- Focus on problem areas but avoid over-sanding a single spot to prevent unevenness.
- Switch to Medium Grit Sandpaper:
- Move up to 120- or 180-grit sandpaper.
- Repeat the sanding process to smooth out the surface further.
- Finish with Fine Grit Sandpaper:
- Use 220- or 400-grit sandpaper for the final sanding.
- Sand lightly to remove any remaining scratches and achieve a polished feel.
- Clean the Surface:
- Wipe away all sawdust with a tack cloth or damp cloth.
- Make sure the surface is completely clean before applying oil.
- Condition the Board:
- Apply mineral oil generously with a soft cloth or brush.
- Let the oil soak in for a few hours or overnight.
- Wipe off excess oil and buff the surface with a clean cloth.
What Sandpaper Grit Should You Use?
Choosing the right grit depends on the condition of your cutting board. For boards with deep scratches or heavy stains, start with coarse sandpaper (60-80 grit). For general maintenance, begin with medium grit (120-180) and finish with fine grit (220-400). The finer the grit, the smoother the surface will feel, which is especially important for end grain boards that come into direct contact with food.
Beginner-Friendly Grit Numbers to Start With
If you’re a beginner, stick to these grit numbers for simplicity:
- Starting Point: 80 grit for rough boards.
- Intermediate Smoothing: 120 grit.
- Final Finish: 220 or 320 grit.
These grits cover most sanding needs without overwhelming you with too many options.
How to Test if Your Cutting Board is Smooth Enough
Testing the smoothness of your cutting board is simple:

- Run your hand across the surface to feel for any rough spots or uneven areas.
- Sprinkle a small amount of water on the board. If the water beads evenly and doesn’t absorb quickly, the board is smooth and ready for use.
- Rub a soft cloth over the board; if it glides easily without catching, the surface is smooth enough.
How Often Should You Sand Your Board?
You don’t need to sand your cutting board frequently. Sand it only when it starts to feel rough, develops stains, or shows deep knife marks. For most users, sanding once or twice a year is sufficient.
Tips to Avoid Common Sanding Mistakes
- Don’t Over-Sand One Spot: This can create uneven surfaces.
- Avoid Skipping Grits: Gradually move from coarse to fine grit for the best results.
- Keep the Board Dry: Moisture can clog sandpaper and damage the wood.
How to Finish Your Cutting Board After Sanding
After sanding, finishing your board is essential to protect it and enhance its appearance. Apply mineral oil generously, let it soak in, and buff the surface. For added protection, consider applying a layer of beeswax over the mineral oil.
Why Mineral Oil is the Best Choice
Mineral oil is the top choice for finishing cutting boards because it’s food-safe, odorless, and penetrates deep into the wood to prevent drying and cracking. Unlike vegetable oils, it won’t go rancid over time, ensuring your board stays safe and hygienic for food preparation.
The Bottom Line
Sanding an end grain cutting board is a straightforward process that can restore its beauty and functionality. With the right tools, sandpaper, and techniques, you can achieve a smooth, professional finish that enhances the board’s durability and performance. Whether you’re a beginner or experienced woodworker, following this guide will ensure your end grain cutting board remains a reliable and attractive kitchen tool for years to come. Happy sanding!